Automated ad scheduling helps businesses display ads at the right times, improving engagement and reducing costs. It works by programming ads to appear during high-impact time slots, such as morning commutes or lunch hours. Here’s a quick overview:
- Benefits: Save money by avoiding off-hours, target specific audiences, track performance, and adjust campaigns easily.
- Steps to Start:
- Analyze Data: Find peak times using past performance metrics.
- Set a Schedule: Choose hours, set budgets, and define ad frequency.
- Monitor Results: Track engagement and refine your schedule for better results.
- Advanced Tactics: Use time-based targeting (e.g., morning for commuters) and rotate ad content to keep it fresh.
Platforms like Blip make this process simple with tools for scheduling, pay-per-play pricing, and real-time performance tracking. Start optimizing your ad campaigns today by syncing them with your audience’s habits.
Related video from YouTube
Setting Up Your Ad Schedule
Planning your ad schedule carefully can help you get better results while keeping costs under control.
1. Review Past Performance
Start by analyzing your campaign data to find out when your audience is most active. Look at metrics like impressions and engagement during different times of the day and week. This will help you pinpoint the best times to run your ads.
- Daily patterns: Identify the hours with the most engagement.
- Weekly trends: Spot the days that perform best.
- Seasonal shifts: Check for changes in performance across months.
These insights will guide you in creating an effective schedule.
2. Set Your Schedule
Once you know your peak times, set up your ad schedule accordingly. Many platforms, like Blip, make this process straightforward.
| Schedule Component | Configuration Options |
|---|---|
| Campaign Duration | Set start and end dates |
| Daily Runtime | Pick specific hours |
| Budget Control | Define daily spending limits |
| Display Frequency | Adjust rotation intervals |
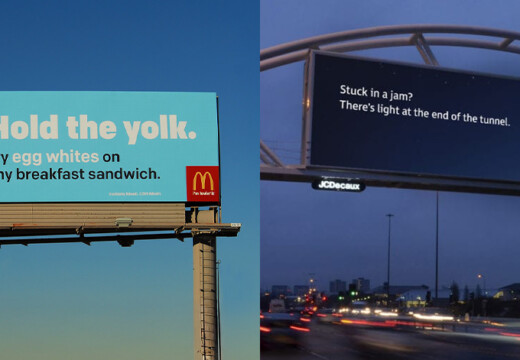
For example, if you’re promoting a breakfast spot, schedule ads during the early morning hours to catch commuters on their way to work. This targeted approach, often called dayparting, ensures your ads reach the right audience at the right time.
3. Track and Adjust
After setting up your schedule, keep an eye on its performance. Regularly review data to identify which time slots deliver the best results and make adjustments as needed.
Focus on these areas:
- Engagement metrics: See how your audience responds during different times.
- Budget usage: Ensure funds are being spent effectively across time periods.
Refine your schedule based on what works best to optimize your campaign’s impact.
sbb-itb-2e2e93f
Advanced Scheduling Methods
Time-based targeting and ad rotation can make your digital billboard campaigns more effective by aligning your ads with audience behavior and keeping your content fresh.
Time-Based Targeting
This approach synchronizes ads with specific audience routines. By analyzing traffic patterns and habits, you can identify the best times to display your ads.
| Time Period | Target Audience | Scheduling Strategy |
|---|---|---|
| Morning Rush (7-9 AM) | Commuters | Frequent displays near major routes |
| Lunch Hours (11 AM-2 PM) | Business District | Focus on restaurant and retail promotions |
| Evening Drive (4-6 PM) | Homebound Traffic | Highlight entertainment and dinner specials |
| Late Night (10 PM-12 AM) | Entertainment Seekers | Showcase nightlife and entertainment options |
Tailor your content to match each time slot’s audience. For example, commuters in the morning prefer quick, clear messages, while evening audiences may engage more with detailed ads.
Ad Rotation Basics
Once your ad timings are aligned with audience habits, keep your content engaging by rotating different ad versions. This prevents viewers from tuning out.
Key tips for ad rotation:
- Mix it up: Design multiple ad variations with distinct visuals or messages while keeping your branding consistent.
- Timing is everything: Space out ad changes thoughtfully to balance visibility and avoid oversaturation.
- Track results: Keep an eye on how each version performs and adjust your rotation strategy to boost effectiveness.
Tools like Blip let you automate ad rotations while giving you control over timing and frequency. Plus, their pay-per-play pricing ensures you’re only charged for actual displays, making it easier to experiment with different strategies without overspending.
Blip‘s Scheduling Tools

Blip’s tools make it easier than ever to manage digital billboard campaigns. Here’s a closer look at how they handle scheduling, cost control, and real-time reporting.
Schedule Options in Blip
Blip’s scheduling interface gives you full control over when your ads run. You can set specific start and end dates, pick the hours your ads will display, and even create recurring schedules to match your campaign goals. The platform automatically adjusts for time zone differences, ensuring your ads appear at the right times across multiple locations.
| Schedule Feature | Function | Benefit |
|---|---|---|
| Custom Time Blocks | Choose specific hours for ads | Target peak audience times |
| Recurring Patterns | Set daily, weekly, or custom cycles | Keep a consistent presence |
| Location-Based Timing | Tailor schedules by billboard | Match local traffic patterns |
Cost Control with Pay-Per-Play
Blip’s pay-per-play model offers flexible spending options. Unlike traditional billboards that charge fixed rates, you only pay when your ad is displayed. Starting at just $0.01 per play with a $20 daily minimum, this system makes outdoor advertising accessible for businesses of any size.
With Blip’s dynamic bidding system, you can:
- Adjust bids based on performance insights
- Increase spending during key moments
- Pause campaigns instantly without fees
- Shift budgets between locations as needed
Live Updates and Reports
Blip’s real-time dashboard helps you track and refine your campaigns. It delivers up-to-the-minute metrics, allowing you to make smarter decisions about your ad placements.
Key metrics include:
- Daily impressions: See how many times your ad was displayed
- Average CPM: Track the cost per thousand views
- Display frequency: Analyze performance by location
- Budget usage: Monitor how your funds are spent
The dashboard also makes it easy to manage multiple campaigns at once. You can tweak schedules on the fly to respond to performance trends, ensuring your billboard ads stay effective and relevant.
Wrapping It Up
Key Takeaways
Automated ad scheduling has reshaped digital billboard advertising, making it easier and more efficient for businesses to manage their campaigns. Platforms like Blip give advertisers the ability to decide when and where their ads appear, while analytics tools help fine-tune campaigns for better results.
By using data-focused tools and a pay-per-play pricing model, businesses can ensure their ads reach the right audience at the best times. These strategies can help you plan your next advertising move with greater precision.
How to Get Started
Follow these steps to kick off your campaign:
| Step | Action | Outcome |
|---|---|---|
| Choose a Platform | Pick a self-serve option like Blip | Access to a wide network of billboards |
| Plan Your Budget | Set a daily minimum (e.g., $20) | Manageable spending with flexible pricing |
| Set a Schedule | Focus on peak traffic hours | Better visibility and audience targeting |
| Track Performance | Use real-time analytics | Adjust campaigns based on performance data |
Start by identifying high-traffic billboard locations that align with your audience’s routines. Build a schedule tailored to local traffic patterns and times of high visibility. Make it a habit to analyze your campaign metrics through the platform’s dashboard, so you can tweak your strategy for maximum impact.
Automated scheduling is transforming outdoor advertising into a smarter, more effective tool for businesses.